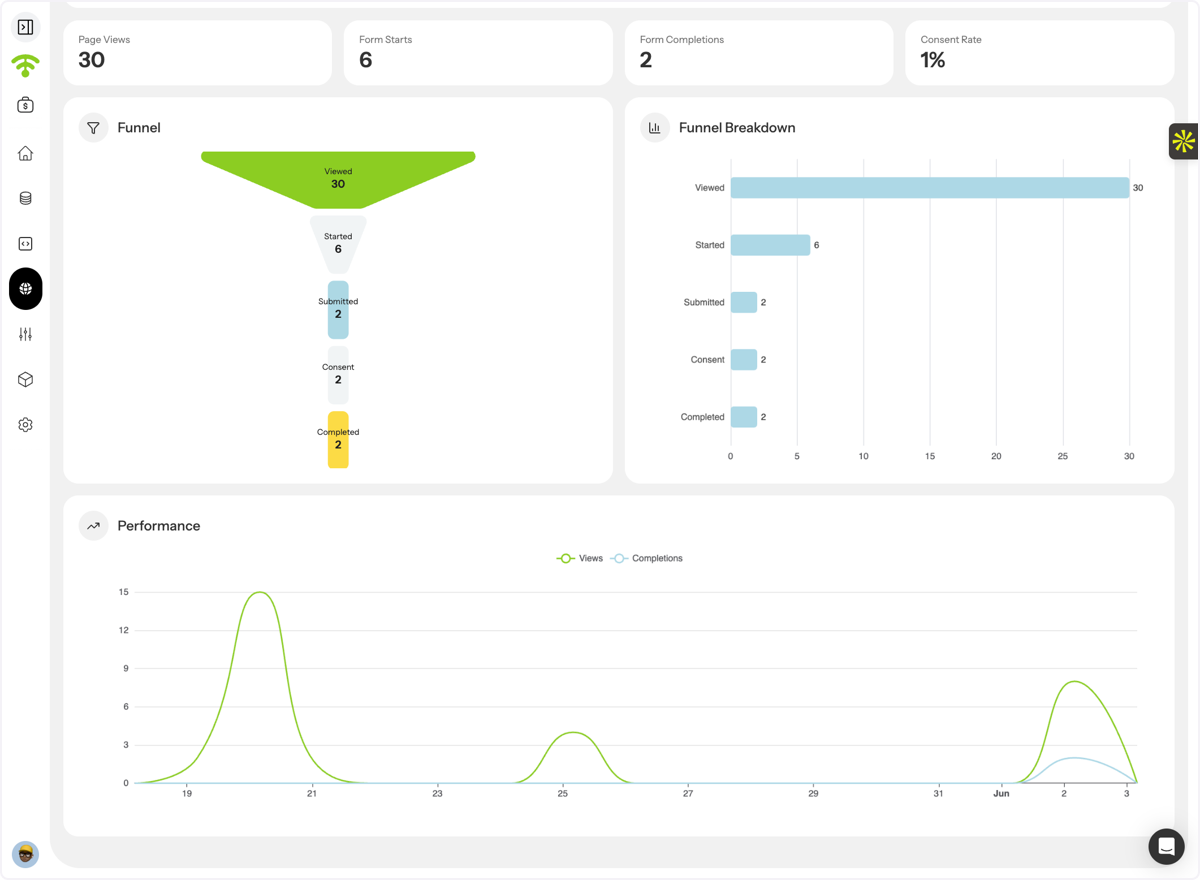
This guide walks you through creating a QR-powered landing page in Affinect. Landing pages help you collect guest data, grow your database, capture marketing consent, and redirect visitors to promotions, menus, offers, or any destination of your choice; all through a shareable link or QR code.
Affinect
Navigate to Landing Pages
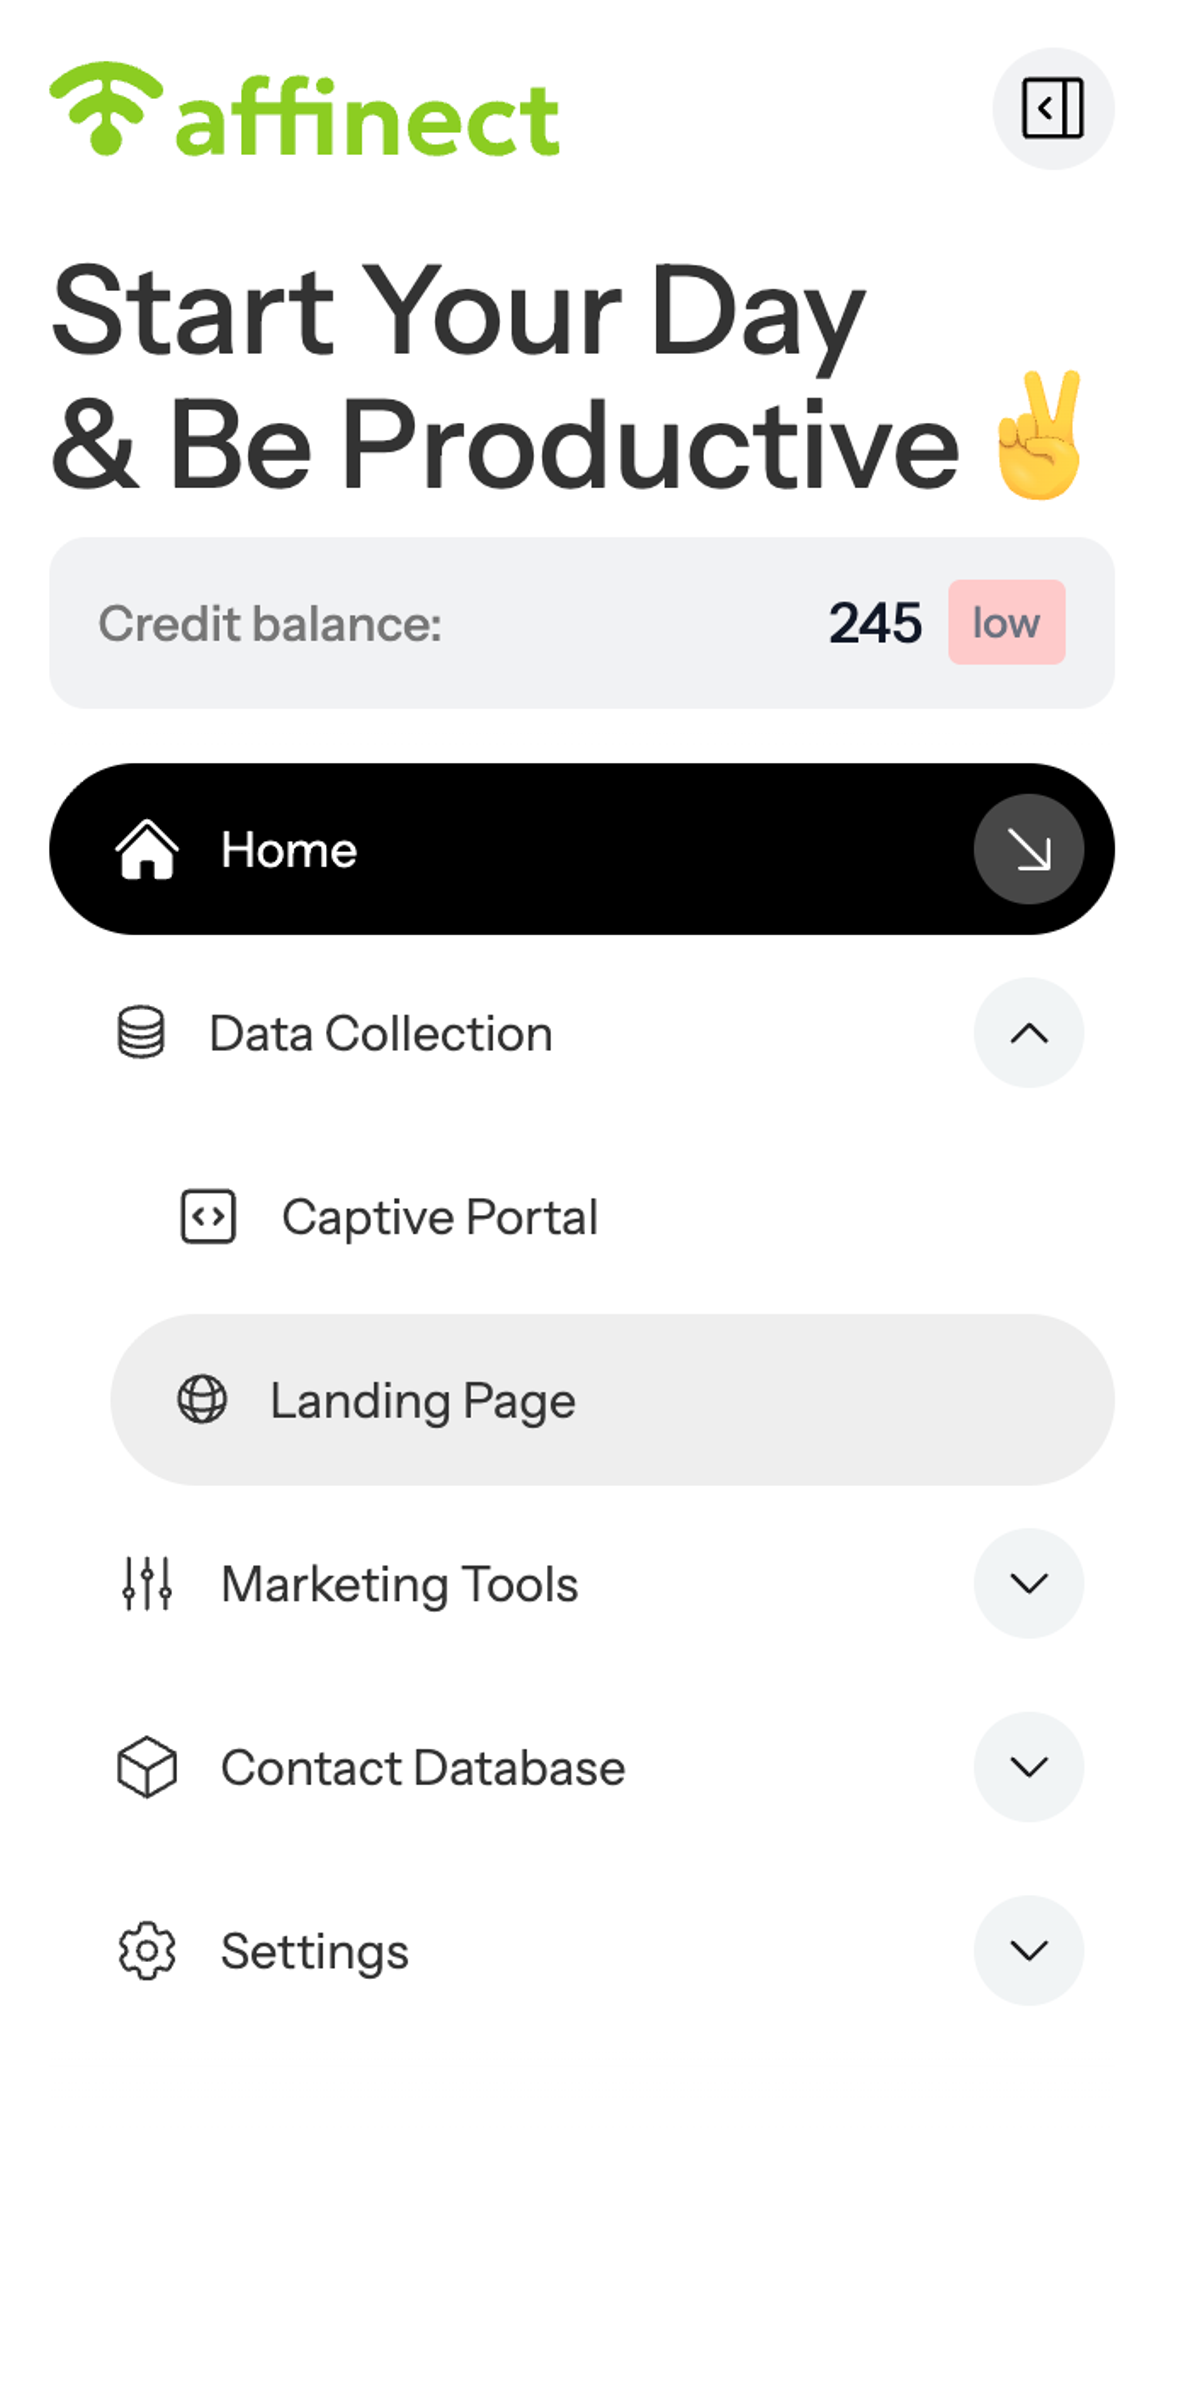
A. Click on Data Collection
B. Click on the Landing Page
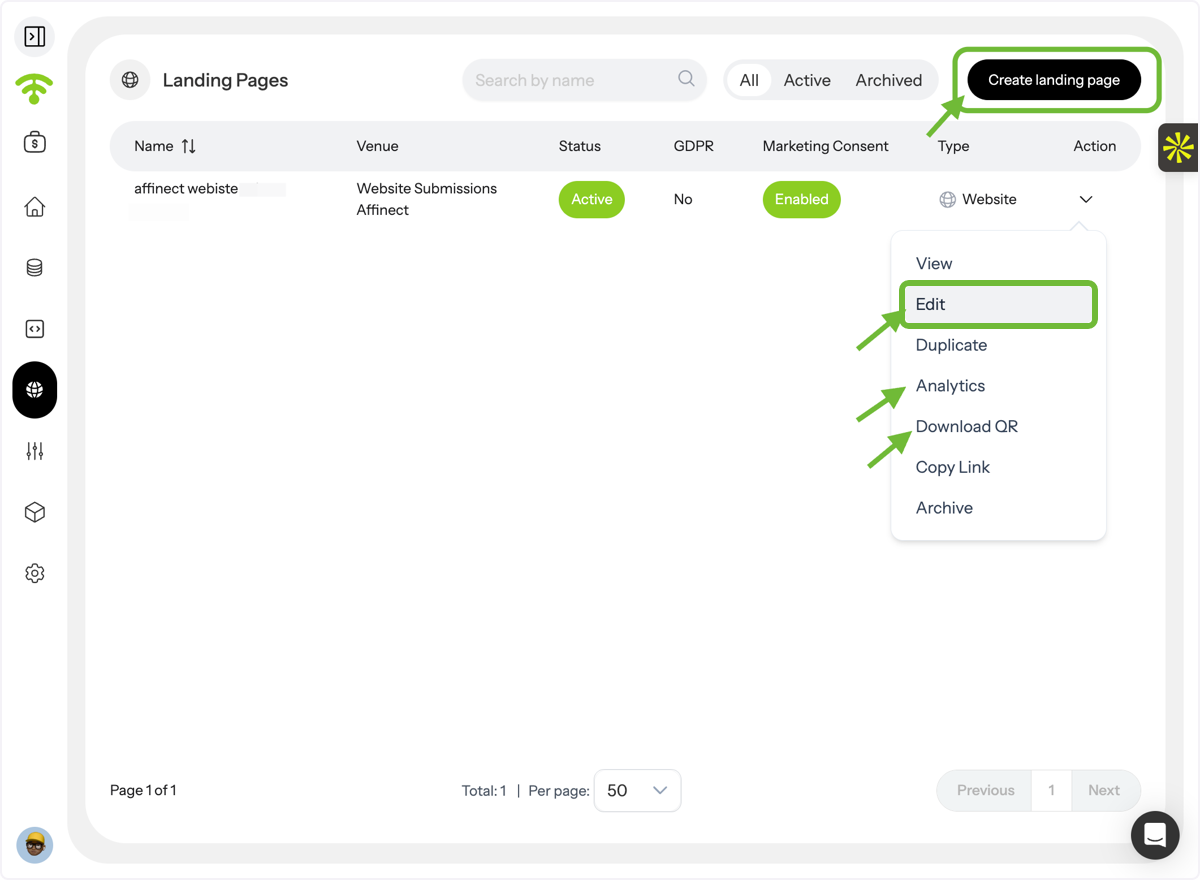
Create or Manage Landing Pages
The Landing Pages dashboard will appear. From here, you can:
- Create a new landing page
- Edit existing pages
- Duplicate pages
- View analytics
- Download the QR code
- Copy the landing page link for sharing
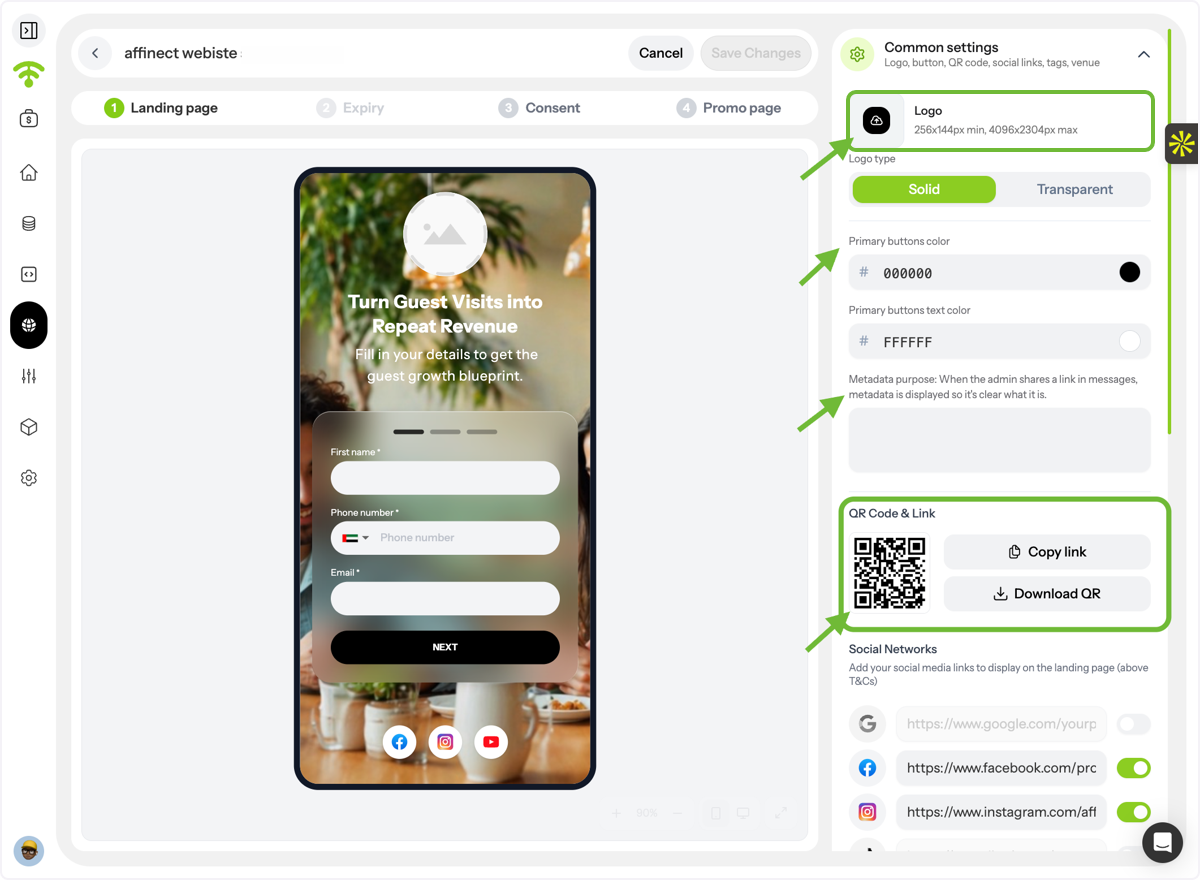
Configure Common Settings
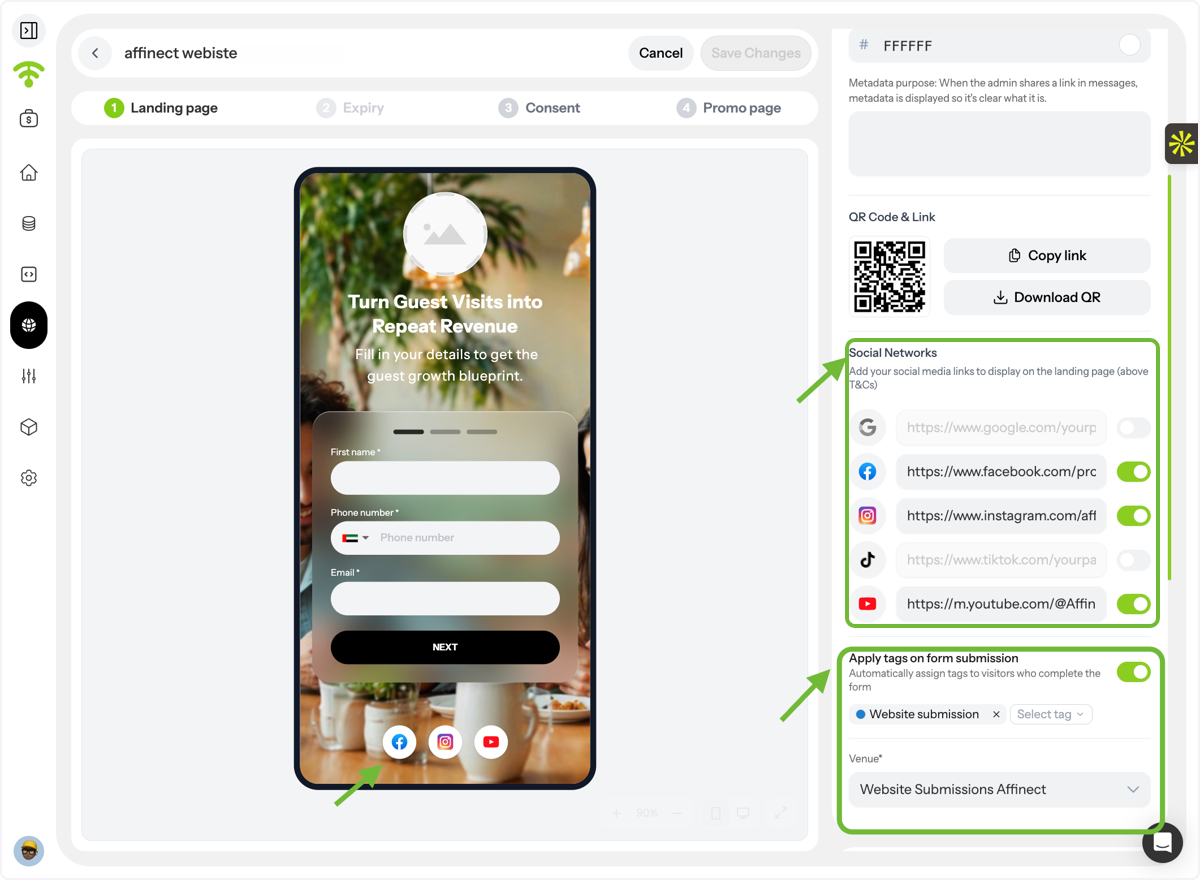
Use the settings panel on the right-hand side to customize your landing page. Under Common Settings, you can:
- Upload your logo
- Select logo type and colors
- Add metadata for better link previews when shared via email, WhatsApp, or social media
- Copy the page link or download the QR code
Add Social Links & Tags
Under Common Settings, you can also:
- Add links to your social media profiles
- Display social icons at the bottom of the form
- Automatically apply tags to everyone who completes the form. These tags can later be used for audience segmentation and campaign targeting.
Customize the Landing Page Design
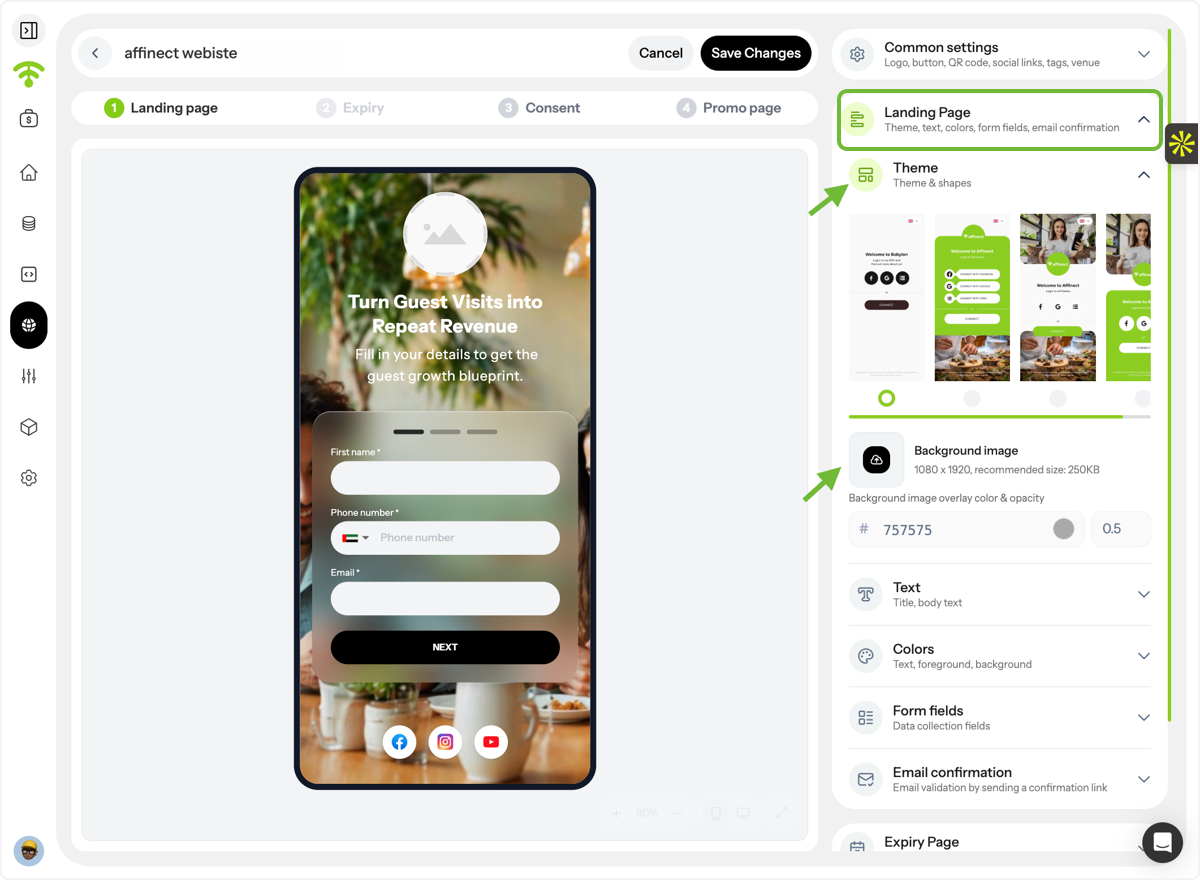
Under Landing Page Settings, choose:
- Theme
- Form shape and styling
- Background image
- Overlay color and opacity
Add Landing Page Content
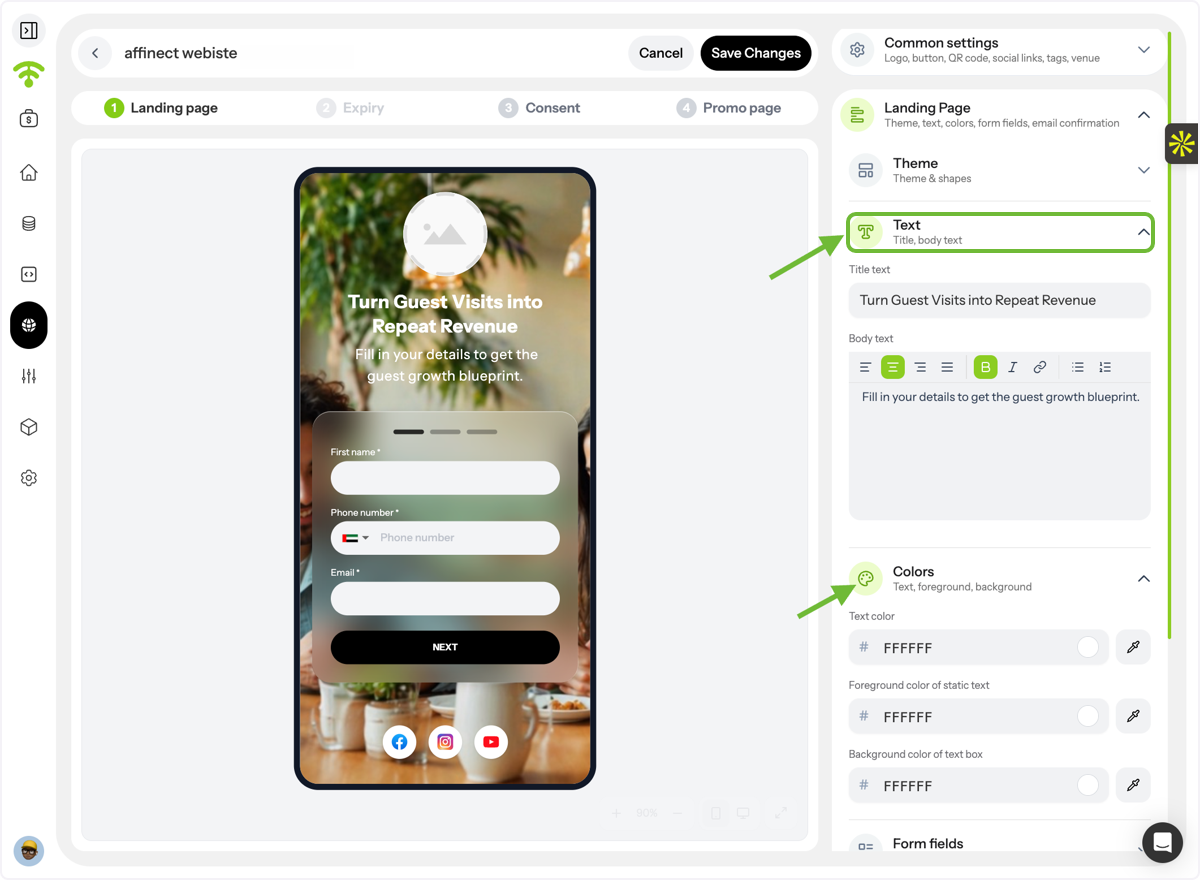
Customize your page by adding:
- Title text
- Body text
You can also adjust:
- Text color
- Static text color
- Text box background color
Configure Form Fields
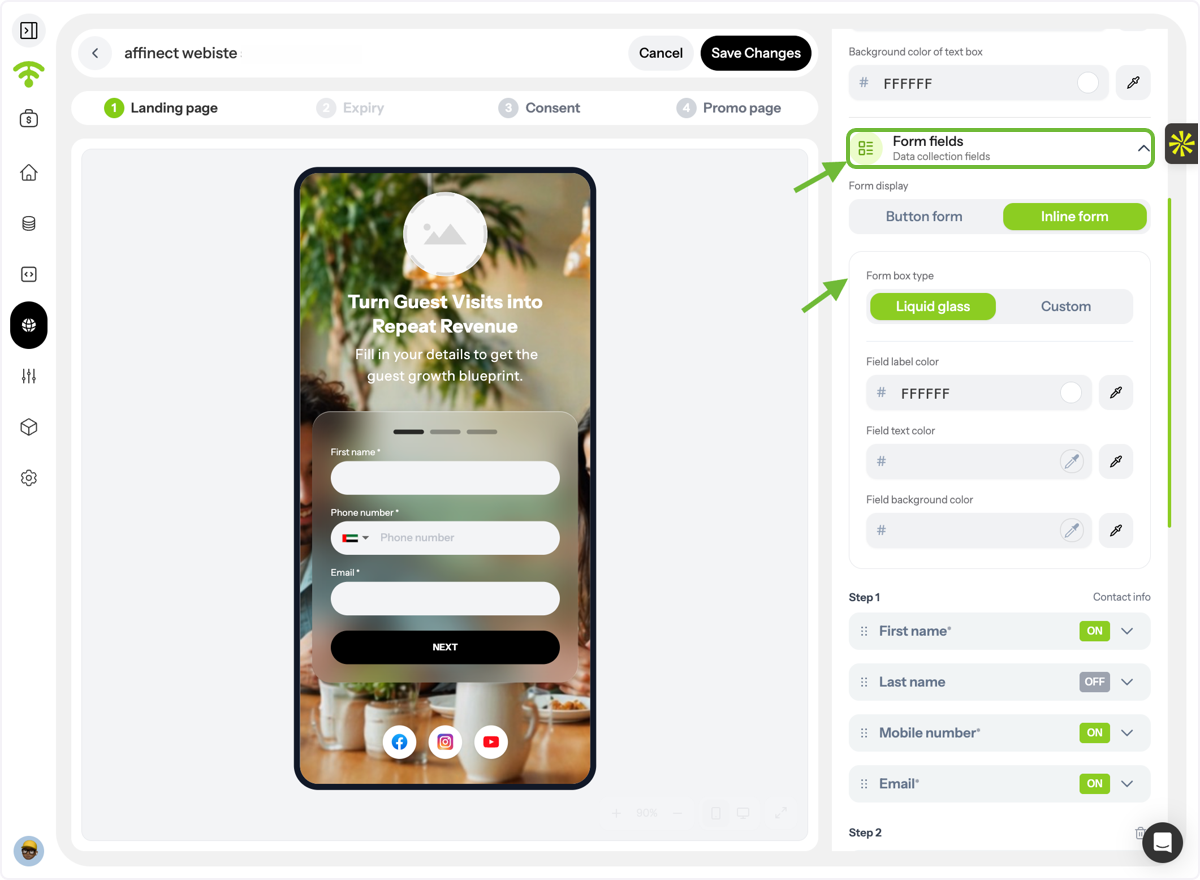
Add the fields you want visitors to complete and customize:
- Field style and appearance
- Labels and placeholder text
- Text and background colors
Add Steps & Custom Fields
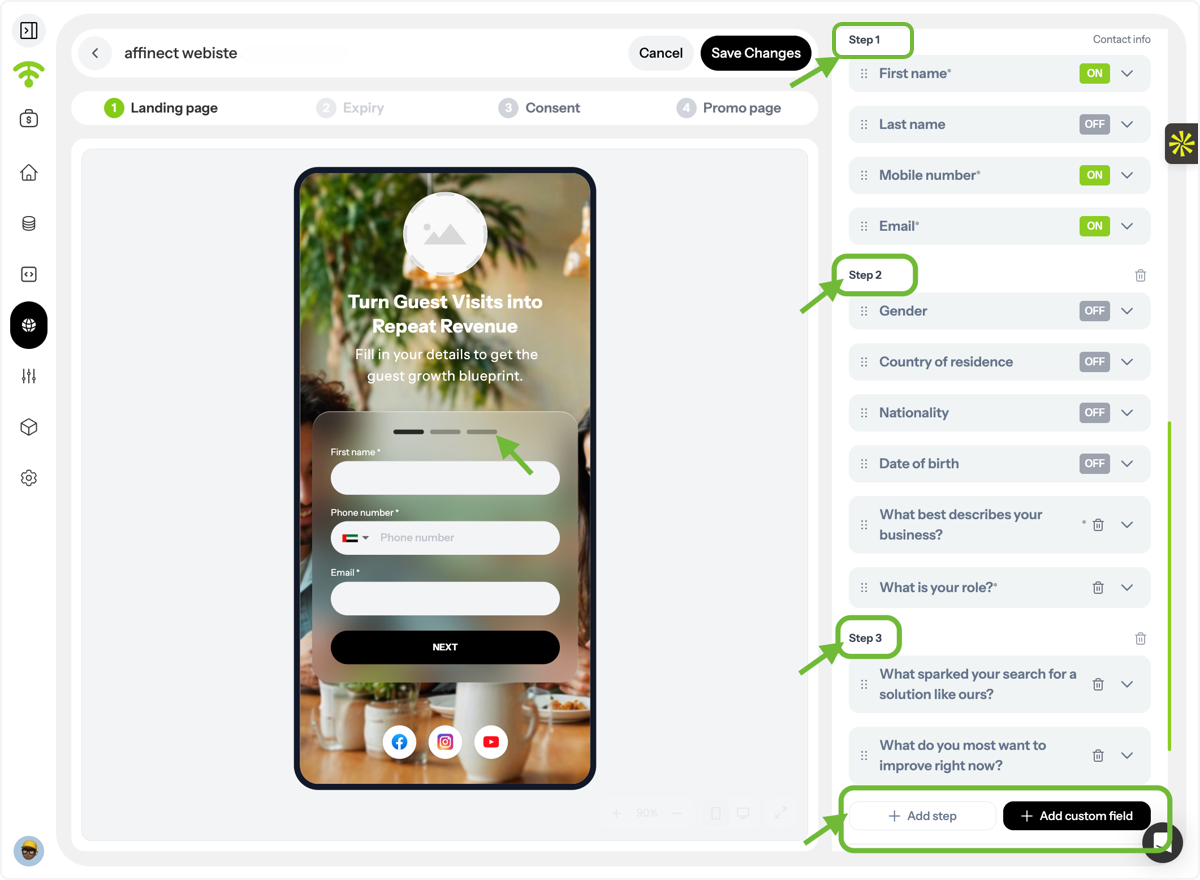
Create multi-step forms and add custom fields to collect the information most relevant to your business. You can also mark specific fields as required.
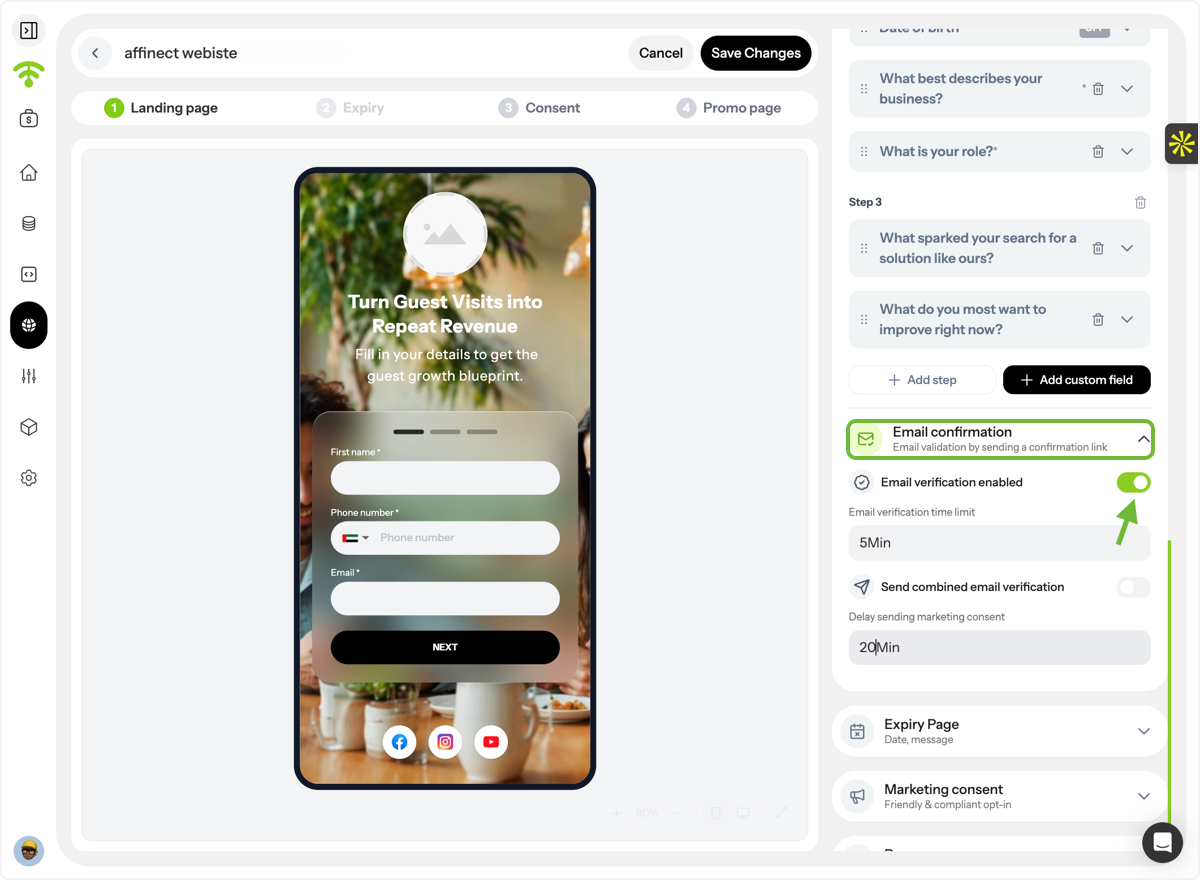
Enable Email Verification
Turn on Email Verification to validate email addresses and reduce fake or invalid submissions.
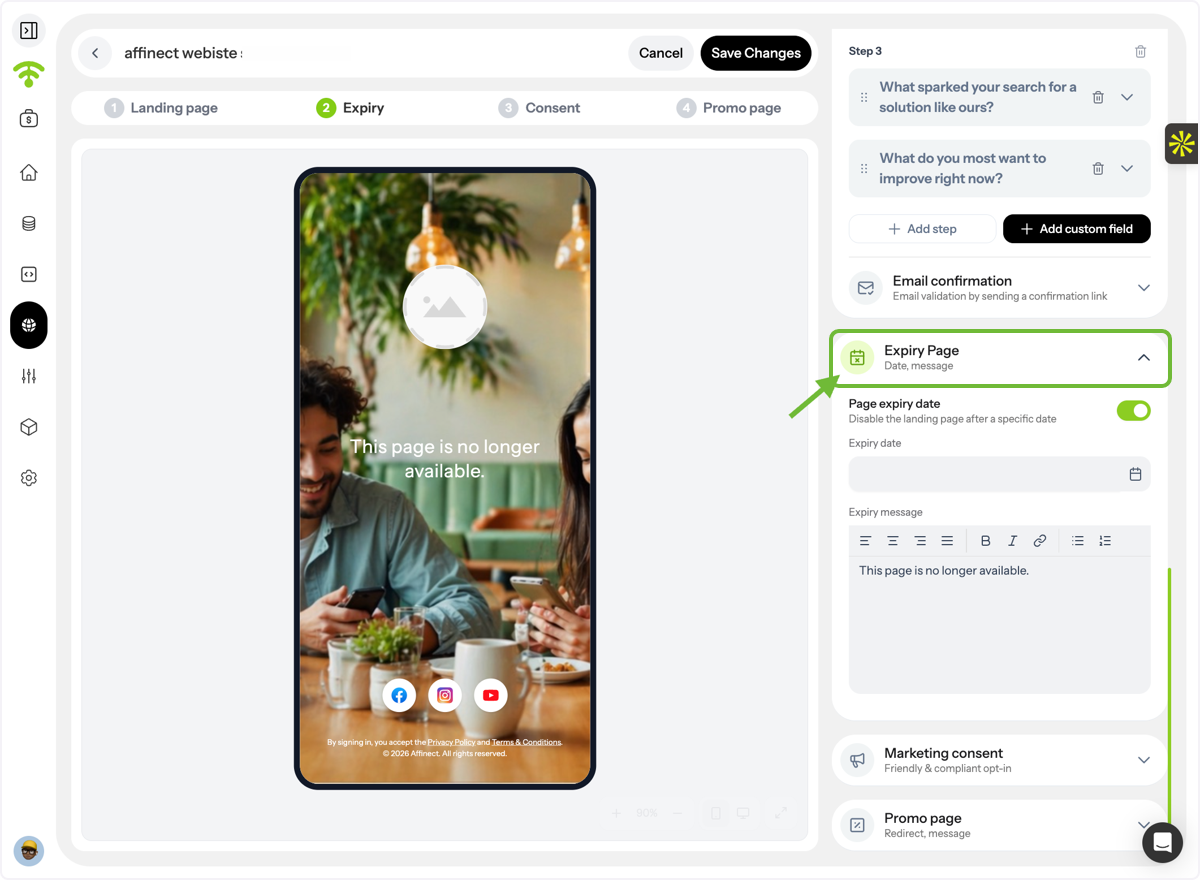
Set an Expiry Date \(Optional\)
You can define:
- A landing page expiry date
- A custom expiry message that visitors will see once the page is no longer active
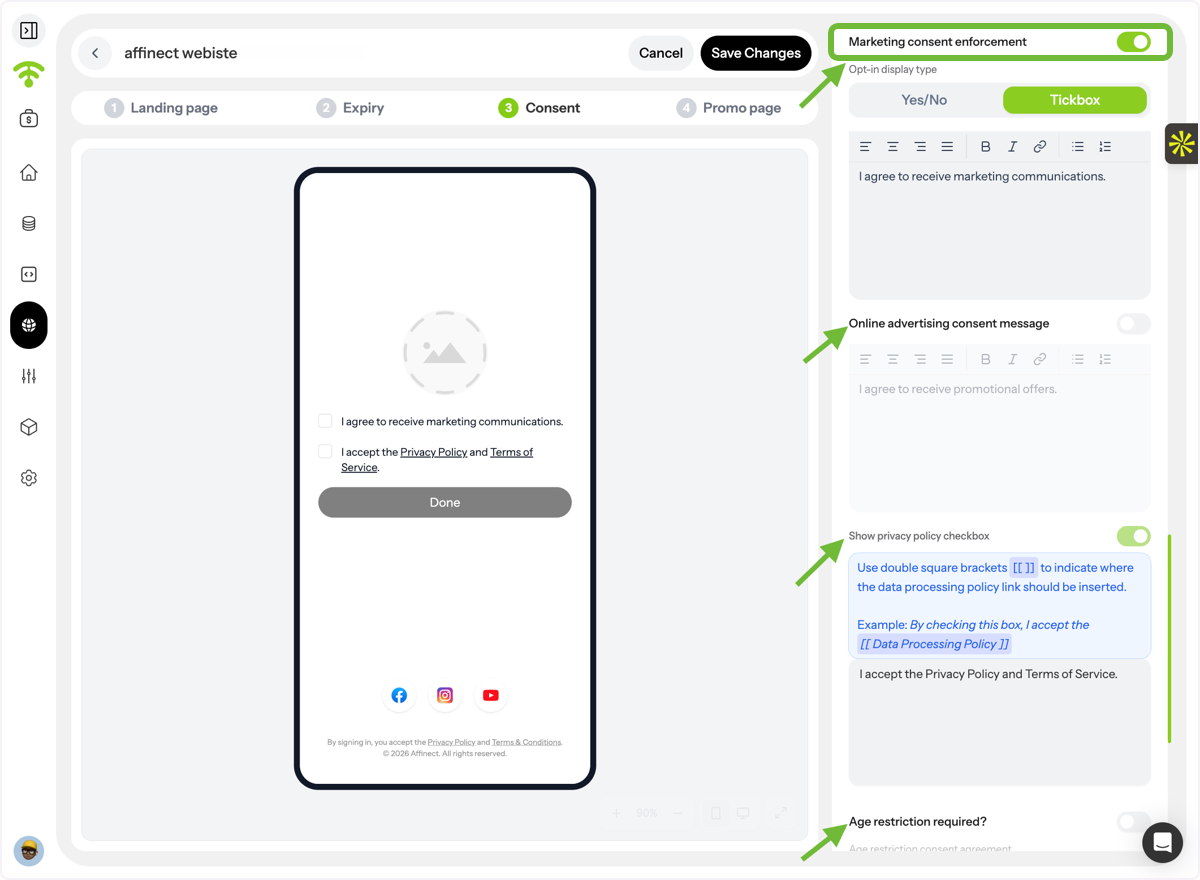
Capture Marketing Consent
Enable Marketing Consent to explicitly collect permission before sending marketing communications, helping you stay compliant with privacy regulations. You can also enable Age Restriction if required.
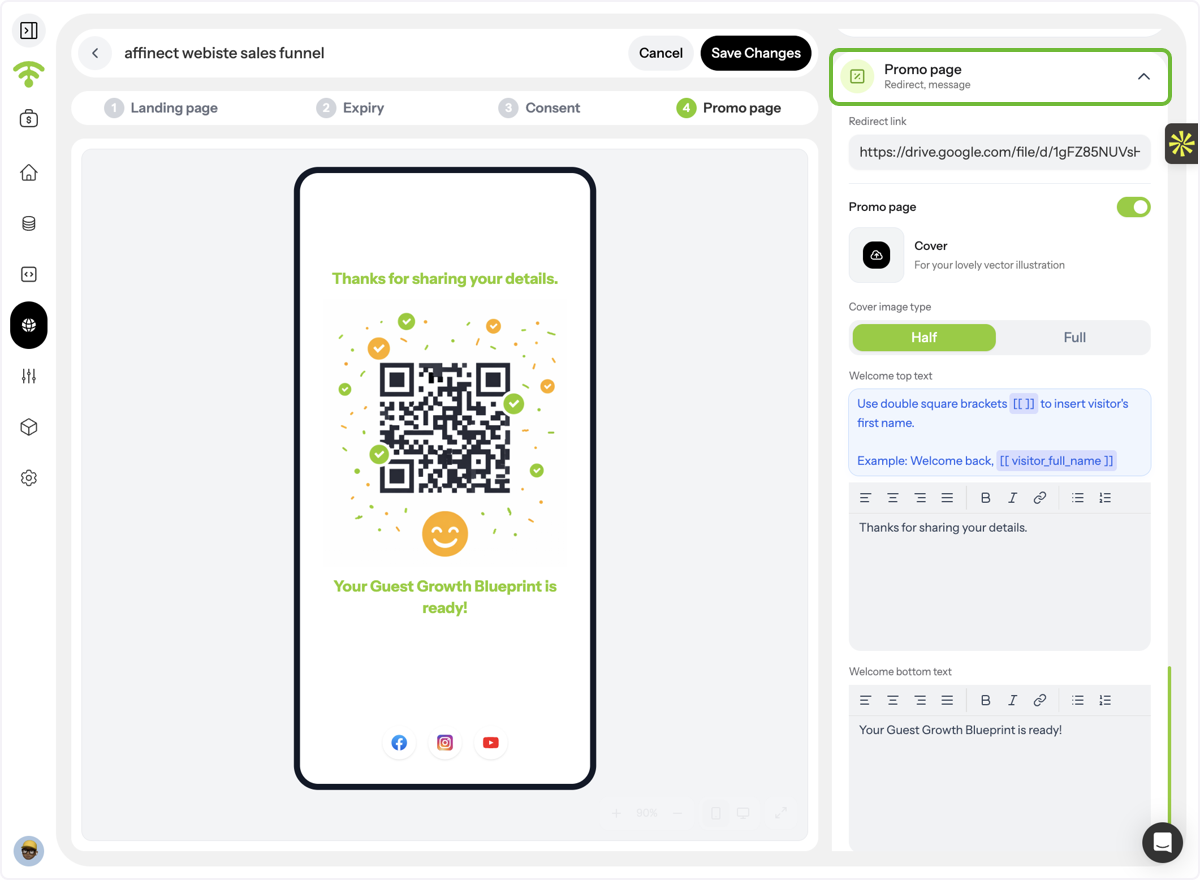
Configure the Promo Page
Set up the page users see after completing the form by adding:
- A destination URL for redirection
- A cover image
- Welcome text or promotional message
Your QR landing page is now ready to share!
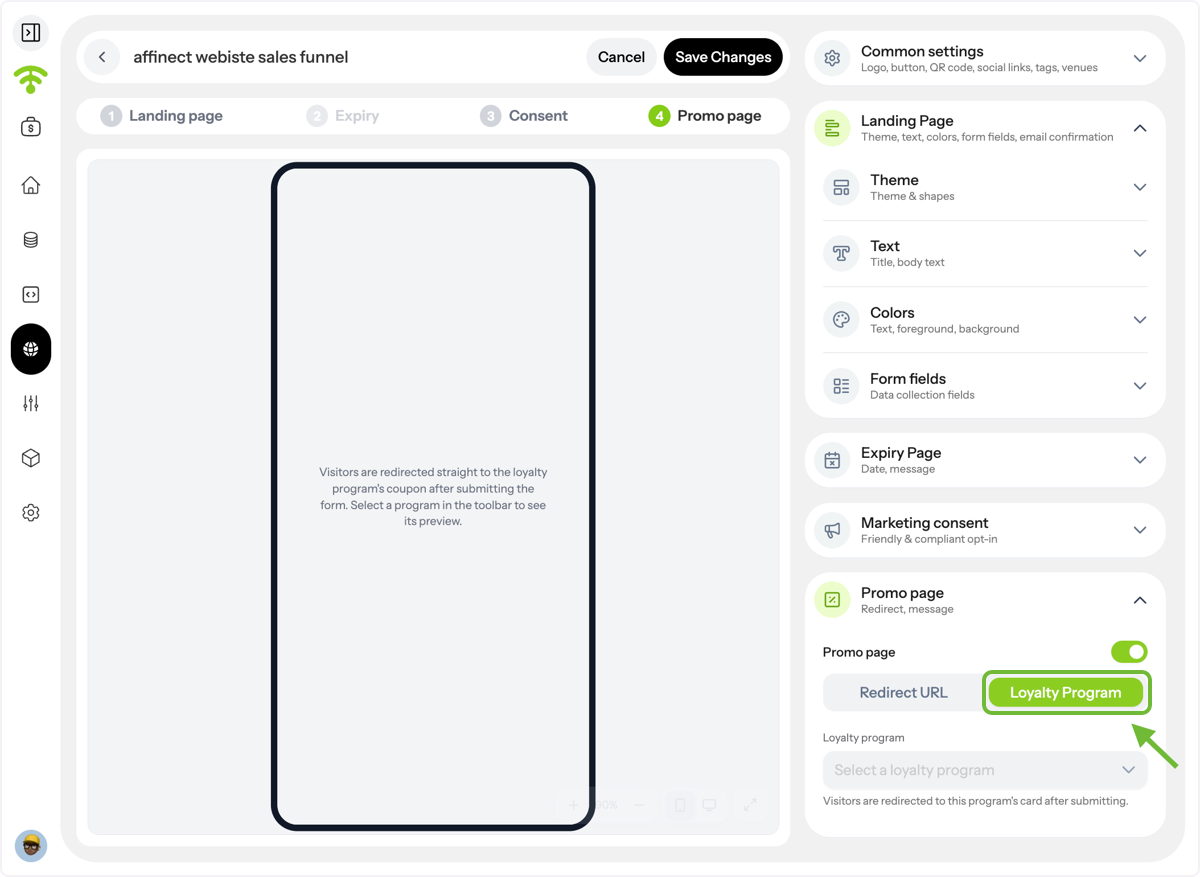
Redirect visitors to the Loyalty Program
As an alternative to a URL, you can redirect the visitors to your loyalty program. Set up your loyalty program from Programs Setup in the dashboard and select it from the toolbar.
Viewing Landing Page Analytics
Return to the Landing Pages dashboard and select Analitikák from the action dropdown menu.
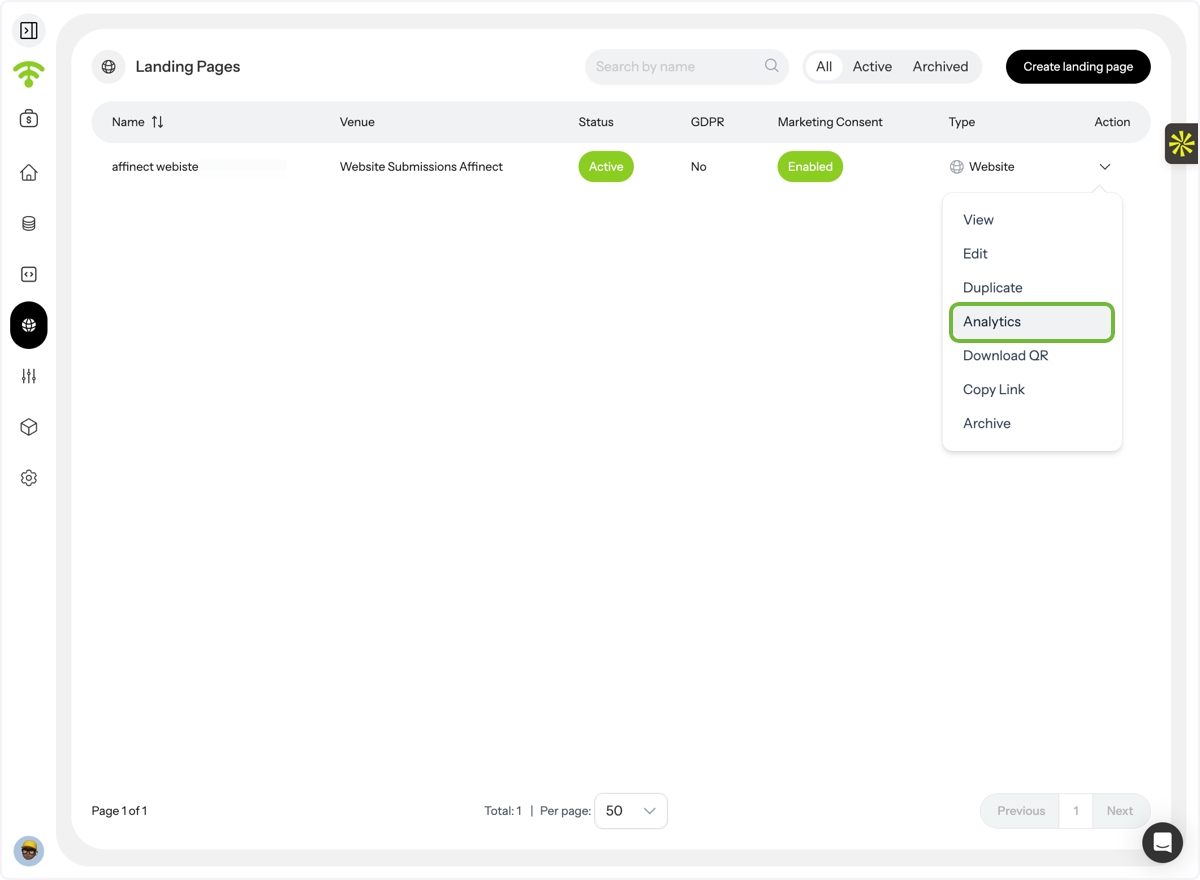
Access Analytics
The analytics dashboard provides a complete view of your landing page performance, including:
- Total page views
- Form starts
- Form completions
- Drop-off points by step
- Funnel performance
- Overall conversion trends and graphs
Use these insights to optimize your forms, improve completion rates, and collect more valuable guest data.